
The technique of embroidery is lovely and soothing. In this post, you know about the basic embroidery tools for beginners. With just a needle and thread, it provides an excellent means of expressing your ideas. Moreover, starting doesn’t have to cost a lot of money, whether of your preference for delicate flower patterns, whimsical typography, or stylish decorative patches. In the approachable tutorial, we’ll go over the basic embroidery supplies for novices in this approachable tutorial, so you’ll know what you need to start sewing.
1. The Basics of Basic Embroidery Tools for Beginners
It is helpful to quickly understand what we enter the embroidery first of all, before going into the equipment. As it’s core, it’s simple the art of using a needle and colorful threads to add beauty to fabric.
Although there are many different styles and techniques, the hand embroidery is the most popular among the novice stitchers because it is the most straightforward and acceptable form to start.
2. Choosing the right Fabric for basic embroidery tools for beginners
The fabric that you choose forms the foundation of your entire embroidery project. For beginners, It is often ideal for those beginners to start from cotton or from linen. Not only are they easy to work with beyond but they also hold your stitches beautifully. Furthermore, a firmly twisted cloth that is not too elastic must be your pick because as this helps keep the design form as you sew.
3. Embroidery Floss: A must have in basic embroidery tools for beginners
Embroidery floss is the thread you’ll use with vigor, bringing designs to life. Because you are able to separate all of the strands in order to adjust the thickness of your stitches, it usually comes in skeins of 6 strands, which is quite handy. Additionally, DMC and Anchor are fantastic brand options, and they offer a dazzling color array is offered by them.
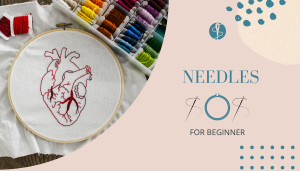
4. Needle used in your embroidery tools
Embroidery needles particularly differ in their make! You’ll want to look specifically for embroidery needles. They are needles that are sometimes called crewel needles. A larger eye for them is indeed a key feature here, thus making the threading of floss quite a breeze. A sharp tip does also allow for you to pierce through fabric with no effort. Usually, a mid-range size around 5–7 is perfect for beginners; sizes range from 1 (largest) to 12 (smallest).
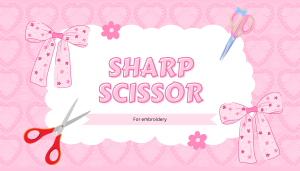
5. Scissors
A small pair of sharp embroidery scissors is really necessary. They allow you to cut threads neatly without causing bothersome fraying or accidently ruining your cloth. Therefore, look for scissors with a sharp tip to cut carefully and get close to your stitching.
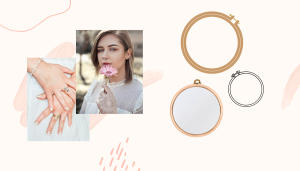
6. To Hoop or Not to Hoop
The embroidery hoop is designed to hold your fabric taut and smooth as you stitch. It’s basically two rings that sandwich your cloth and hold it taut. While some (most) advanced embroiderers sew without the hoop, but I highly recommend using one as you’re learning, because it will make everything so much easier and help you maintain your work more neatly.
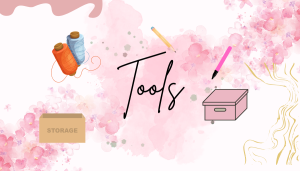
7. Other Notions and Supplies
Some fresh tools can really help you along on your embroidery trip-
- Fabric marker or pencil: It’s helpful for drawing a design right on the fabric.
- Thread conditioner( similar as beeswax): This Lilliputian thing will help keep your fluff from tangling as you sew.
- Thimble: A little cap to keep your cutlet from getting poked when you push the needle through fabric.
- Storage box or organizer: Great to keep your colored fluff and tools organized, neat and accessible!
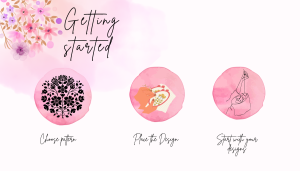
8.Getting Started
Now that you have all your tools, it’s officially time to start your first project!
Here’s how to get started:
- Choose an easy pattern: Begin with something small and attainable to boost your confidence.
- Place the design: Trace the design onto your fabric with the help of your marker/ pencil.
- Fit the fabric in the hoop: secure and tight.
- Thread your needle with the floss of your choice.
- Begin with simple stitches, such as the backstitch and satin stitch.
- Just go at your own pace, have fun, and remember – if you practice, you’ll improve!
9. Finishing the Project
- Now that you’ve finished your stitching, it’s time to enhance your work.
- First, Wash your embroidery gently to remove any pen lines.
- Next, Press it, face-down, against a clean towel with a warm iron to flatten it.
- Finally, Show it off! You could frame it, sew it onto a favorite bag or even make it into a pretty piece of hoop art for your wall.
Final thoughts
You don’t need to make starting embroidery difficult. To Begin with, these are the essential embroidery supplies for beginners that you’ll need to have on hand to tackle your first project with confidence. Additionally don’t forget to have fun in the process – every little stitch you produce just brings you one step closer to getting really good at this beautiful art form. Ultimately, mastering the basic embroidery tools for beginners makes starting embroidery simpler and more fun.
FAQs for Basic Embroidery Tools for Beginners
1. What do I need to start embroidery as a Beginner?
You’ll need an embroidery needle, floss, fabric (like cotton), scissors, and an embroidery hoop. Optional: fabric marker, thimble, thread organizer.
2. Do I need to use an embroidery hoop ?
A hoop isn’t required, but it helps keep fabric tight and makes stitches cleaner—especially for beginners.
3. Can I use sewing thread for embroidery?
You can, but embroidery floss is thicker, stronger, and gives better decorative results.
4. What size needle is best for embroidery?
Use size 5–7 needles. Choose one that fits your floss and easily pierces your fabric.